There is a particular kind of guilt that lives in your camera roll from past vacations. You know the exact shot, like the golden hour light spilling over a Santorini cliffside or the quiet corner of a Parisian café. Capturing those memories brings immense joy, but most of us leave those irreplaceable moments gathering digital dust. The gap between a stunning travel memory and a wall that actually does it justice often feels complicated or expensive. It does not have to be this way.
The three best hacks for making travel photos look expensive are curating a themed gallery wall, mixing frame finishes with wide matting, and building layered vignette displays. These simple framing and styling techniques transform digital vacation snapshots into high-end, gallery-quality home decor.
Here are three surprisingly simple ways to transform your travel photos into luxury travel decor. This kind of styling makes guests stop mid-conversation and ask about your worldly adventures.
1. Build a Curated Gallery Wall
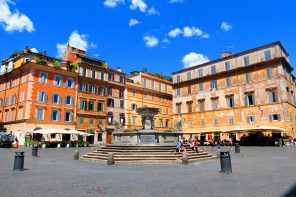
Imagine dedicating one wall in your living room to a visual journey through Southeast Asia. Overwater bungalows in Bali can be placed beside a misty temple in Chiang Mai, anchored by a long-tail boat cutting through emerald water.
Rather than hanging a random assortment of prints, organize your travel photos by destination, mood, or a specific color palette. Treating your wall like a curated physical travel journal creates a cohesive narrative and separates a designed space from a cluttered one. Execution requires consistent framing to maintain that high-end look across your gallery wall frames.
Using coordinated choices like Americanflat’s gallery wall frame set provides matching finishes and proportional sizing. This ensures the display looks intentional without requiring custom framing budgets.
Pre-installed hardware also removes the friction of complex installations, making it simple to achieve a gallery-quality presentation at home. Interior designers heavily rely on the rule of odds for spatial arrangements. Group frames in odd numbers, like threes or fives, and mix horizontal and vertical orientations.
Interestingly, a University of California, Berkeley study found aesthetic preference is highest for pictures where the subject is centered and faces into the frame. Combining this centering technique with a flowing layout allows you to relive the trip beautifully every time you walk past.
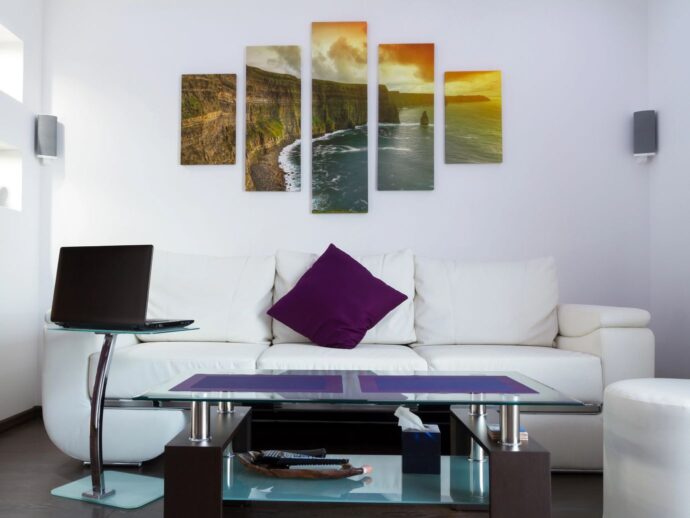
2. Mix Frame Finishes and Mat Sizes
The most expensive-looking gallery displays in interior design magazines rarely feature perfectly matched frames. Instead, they rely on carefully controlled contrast to catch the eye. Deliberately mixing finishes creates a layered, collected-over-time aesthetic that no single matching set can replicate. Try pairing matte black with natural wood, or brushed gold with crisp white for an elevated look.
Matting makes an even bigger difference in elevating standard prints into luxury travel decor. For your most breathtaking hero shots, opt for noticeably wider matting. A generous white or cream mat gives the image visual breathing room, immediately signaling a fine-art presentation similar to museum displays.
The key to keeping an eclectic mix from feeling chaotic is choosing one unifying element. Using the same mat color across different frame finishes provides a single thread of consistency. You can also apply a similar warm photo filter to your images to tie the collection together. This holds everything together visually while allowing each frame to feel completely distinct.
3. Create a Layered Travel Vignette
Not every travel memory requires an entire wall to make an impact. Some of the most striking wanderlust home decor lives on a single console table or floating hallway shelf. A travel vignette is a small, layered, three-dimensional display that tells a complete story in one localized spot. In fact, a recent Pennsylvania State University analysis of 50,000 living room listings found that 30.2% successfully utilized localized decor to elevate the space.
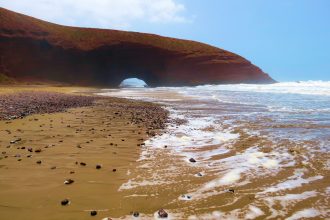
Picture a framed photo of a Marrakech medina doorway placed beside a small ceramic market bowl and a dried palm frond. Suddenly, that everyday shelf becomes a beautiful portal to another place.
Here is a simple three-part formula to build your own engaging vignette display.
- One anchor frame: Choose a standout photo and place it in a complementary frame. Smaller sizes, like 4×6 or 5×7, work best for vignettes because they are versatile and easy to reposition.
- One tactile element: Incorporate a physical memento, such as a local textile, a small plant, or a stack of travel books. This tactile addition makes the space feel lived-in and prompts conversation.
- One neutral base: Ground the arrangement with a simple tray or woven runner. This defines the vignette’s boundary, ensuring the collection feels deliberate rather than cluttered.
This dynamic approach allows your display to organically grow and evolve. Every time you return from a new trip, you can swap a frame or add a new, unique souvenir. This practice effectively turns a simple corner of your home into a physical, beautiful passport.
Now, It’s Your Turn
Your best travel photos represent a life lived with curiosity and boldness, and they deserve to be displayed with equal care. You do not need a professional designer or an unlimited budget to bring these memories into your daily environment. You simply need a starting point and a little creative confidence.
Start by curating a themed gallery wall that takes your eye on a journey through your favorite adventures. Experiment with mixed finishes and intentional wide matting to bring fine-art energy to your home. Then, find one shelf or console table to style an intimate vignette that tells a unique story.
Select your favorite travel memory today, find the right frame, and elevate your space with the adventures you have already lived. Your best trips are not behind you; they are waiting to be celebrated on your walls.